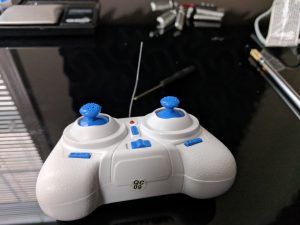
I picked up the Eachine E011 from Banggood a few weeks ago as I wanted a quad that I could literally fly anywhere for a laugh. The eachine E011 really delivers for that purpose. If you’re here, you’re either considering buying one or you’re looking to get more out of the one you’ve already got.
If you don’t have one, let me help you with that decision — best fun I’ve had for the money in a long time. Through this link, use the coupon code aff7off for 7% off as well.
I will be updating this “review”/tutorial as I have time with my experiences as I’ve added an FPV camera, switched flight controllers to Beecore v2 with betaflight, and the various modifications I’ve performed to get the most out of the E011.
The eachine E011 is an incredibly fun “toy.” It’s very well put together, it’s nearly crash proof, it’s literally harmless (you could run it into anything at full throttle and it’s just going to bounce off), and it’s CHEAP.
The last two are probably the things that attract me to it the most. I enjoy being able to fly the E011 without much stress about where it happens to end up. I have no concerns at all about flying this around people, including my toddler, or indoors. The CHEAP part is great because you can get the whole kit for around $16. With a camera, it’s about $30-40, and with an upgraded flight controller it’s either $30-40 (in the case of silverware) or perhaps $50ish with beecore or similar. Basically, you can afford to lose it or break it and you won’t cry about it at all.
I started out flying the E011 mostly line of sight. I wasn’t sure about FPV as while I’ve flown DJI drones a lot for work and very much appreciated the ability to see what the drone sees, I just didn’t think I’d get into it on a micro (nano?) quad. Well, I was wrong. After a few days of ripping around line of sight, the FPV bug bit.
HV Battery Upgrade
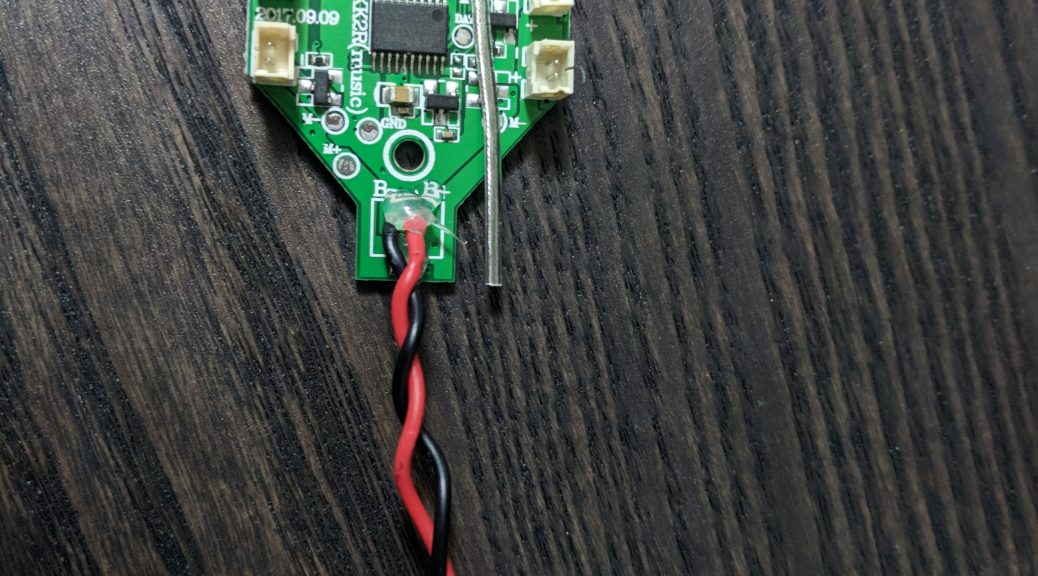
Best thing to do if you’ve bought an E011 is upgrade to some HV battery packs. You can pretty much just throw away the stock batteries. As long as you can do some basic soldering (or are willing to try), these are by far the best upgrade you can do.
“High voltage” LiPo batteries have kind of a funny name if you as me as we’re only talking about a small increase in voltage (about 0.15v). However, that’s pretty substantial with these little 1S quads. You get higher voltage, the batteries sag much less under load giving you higher voltage more consistently even after the tiny fully charged advantage goes away, and you get lower weight. Lower weight because that extra charge capacity buys you something similar to additional mah.
The BetaFPV 260mah HV batteries which come stock with all of their products are excellent. They are around 6.7-6.8 grams so in addition to the additional voltage, you’re going to lose a gram or two depending on the battery you’re comparing it too as well. This makes for a HUGE improvement in performance. They’re also really cheap.
There are no real modifications required to use the HV batteries. The only thing you’ll need to do is swap the PH2.0 connector on the E011 flight controller for the included pig tail. Once you’ve done that, you have a few options on using them in the e011 frame. The easiest is to simply insert them at an angle (the end will go through the hole between the last “rib” on the stock battery tray and the rear wall of the battery tray). You *may* need to trim the battery compartment a hair to make this work, but ideally it’s a tighter fit so it’ll stay put in flight. Also, you can use rubber bands and remove all of the ribs from the battery tray which works out well if you’re using rubber bands to secure your FPV camera as well.
HV Charger? I’m told a hobby grade charger is best. However, I’ve had great experiences with these chargers and they’re very inexpensive. You do need a HV charger to get the full 4.35 charge out of your lipos. In my experience, these have been very accurate and as long as you have a 2 (or greater) Amp USB source, you can charge your batteries anywhere without needing a bulky kit.
Get them on Amazon: 8 HV Batteries (BetaFPV, best flight times, still cheap, readily available) / HV USB Charger
Line of Sight Mods
For line of sight flying, I mostly just stripped off the canopy and of course the “lego” guy.
You CAN save about 0.1 grams on the stock batteries (including the 45C versions) as well as the HV packs that I picked up by simply removing the stickers. 0.1 grams isn’t a lot, but it is indeed measurable at this scale of craft.
You can save a half gram by direct soldering the motors to the flight controller if you’re feeling so inclined.
However, a better battery is a HUGE upgrade even on the E011.
I’ve recently re-flashed the E011’s board with silverware (an alternative firmware). I fly mostly level mode and I’m starting to toy with acro mode. Being able to set a higher maximum angle will take your quad to a whole new level of speed and fun factor. More on that in a bit.
Adding a Camera for FPV
It seems there are a number of FPV cameras available and they all have slightly different features. For the most part, they’re all the same as best I can tell. Some handle low/high light situations better than others, and some are more efficient than others with power.
I recommend either the Wolfwhoop WT05 (if you don’t care about OSD) or the WT07. The w05 can be modified for OSD, but it’s easier to start with one that has the leads for OSD. The difference is in how the video feed is routed. In the w05 you only have 3 wires. A video out, positive and negative voltage. On the w07 you’ll have an extra video wire. If you don’t want to use OSD you just tie the wires together. Otherwise, the two wires are a video out to the mainboard where the software will add the OSD, and then other wire is a video “in” back to the transmitter. Needless to say, the w07 is “better” as it can be either.
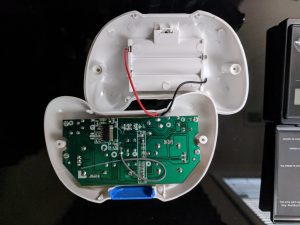
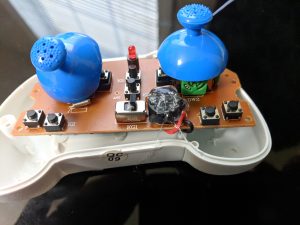
On both the stock flight controller and the beecore controller, I soldered to the main power leads. It’s very trivial work if you’ve ever soldered before.
Both flight controllers have a 5V “port” on them that you could use as well, but I’ve read mixed results using that particular source so I stuck with the main power lead on both.
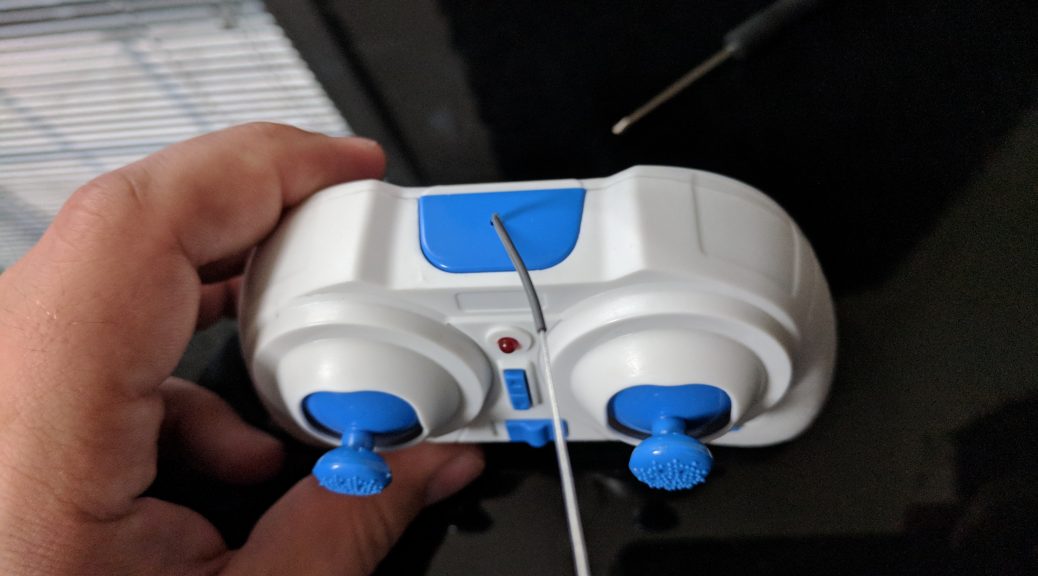
I set my FPV camera to 5.8 ghz “exactly” as that’s what the length of the antenna seems to be optimized for.
On the Wolfwhoop, you’ll just long press or short press on the only button on the AIO camera to select a channel. There is a sheet in the box that details how to determine the frequency based on that. If you’re experiencing bad FPV reception, it’s likely because you haven’t chosen the EXACT frequency in both your AIO and your FPV goggles. I found that out the hard way.
To MOUNT the FPV camera, you can use either a canopy or rubber bands. Rubber bands are fragile and will need replacing almost every time you crash. I use hair rubber bands. They are, however, extremely lightweight and if you’re using HV batteries, then they have dual purpose.
I used the E013’s canopy that I purchased off bangood for one quad and I’m currently trying out a 15 degree mount from banggood as well.
The E013 canopy fits the E011 perfectly. I did need two screws which were not included but I had from the flight controller I smoked (mentioned earlier). If you’re going to buy the Beecore V2 flight controller, it comes with screws that will secure the board and the canopy for you. The screws that come with the Beecore v2 are also slightly lighter than the stock screws, as a side note.
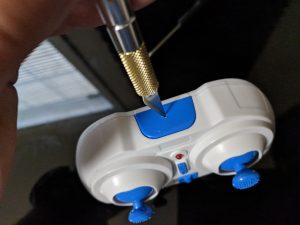
I did have to enlarge the antenna opening a bit to fit the Wolfwhoop’s antenna through. This “mod” was especially needed because I added a bit of heatshrink at the connection point of the antenna and the Wolfwhoop’s camera board.
The hole for the channel selection on the canopy is in the exact right place for the Wolfwhoop, which makes adjusting that easy when needed.
Installation is pretty self explanatory. Just push the camera through the hole in the front, and “press fit” the antenna through the top. On the stock flight controller, the antenna can be run through the top of the canopy as well by poking a small hole. I found this gave me better range on the stock flight controller and toy transmitter. After that, you’ll want to put a piece of foam between the camera/vtx and the flight controller. I used a piece of foam from the wolfwhoop box. Total weight was around 0.03 grams for the foam.
I clipped the front of the canopy off and may clip the rear off too at a later time. The front has no real purpose and it saved a tenth of a gram. I also liked the look better.
On the stock flight controller with the stock firmware, the angle of the camera is fine with the E013 canopy. However, once I switched to betaflight, it became more necessary to angle the camera up. The foam I mentioned above, helped me achieve a small angle, about 10-15 degrees (purely a guess). Flying in auto-level mode, this seems fine. I may move up to a more aggressive angle especially if I start flying Acro more.
FPV goggles – Budget option
I didn’t want to spend a lot of money. Knowing that the cameras available for these quads are not the best quality, I wasn’t terribly worried about the resolution of any goggles I purchased. I don’t intend at this stage to fly much larger quads with better cameras, so I didn’t really view the FPV goggle purchase as a “long term investment” either.
I opted for the eachine 007 Pro box-style goggles. The reviews were all very good and now that I have them myself — they are very good, especially for the price/purpose.
I found the 007 Pro to be comfortable to wear for extended periods, easy to charge, easy to get sync’ed up with the quad and they have a fairly decent display.
The 007 Pro goggles are around $45, so even if you did want something “better” later on — these are great spares. Otherwise, they’re great primary goggles and get the job done.
I did end up ruining my 007 Pro goggles in an attempt to add a fatshark diversity module. I was successful, but unfortunately I broke the ribbon connector between the LCD and the LCD controller. I was going to attempt to add a larger higher resolution screen, but eventually just gave up on goggles all together for the time being. I have moved on to a 7″ LCD with a sunhood. More on that later.
Beecore V2 and BetaFlight
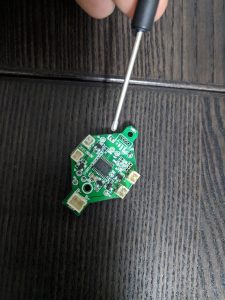
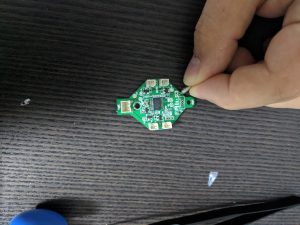
I plan to experiment with Silverware soon. However, I have converted the E011 to a beecore v2 flight controller and have flashed the latest version of Betaflight to the board. I will soon write a full write up for that as I ran into a lot of small issues since I had never set something like this up before.
For the most part, you can go ahead and mount the beecore v2 directly to the E011. The rubber spacers, you don’t seem to need at all and I found they more got in the way than they helped.
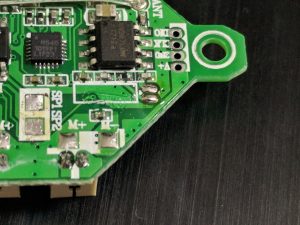
I connected my computer to the flight controller with a standard micro USB cable and used the Betaflight configurator stand-alone program to connect. It connected straight away without any drama and I clicked on the CLI tab (bottom one) and typed “version” to find out what kind of board we were working with. Mine said OMNIBUS.
I flashed the beecore v2 with the latest Betaflight version for Omnibus and got lucky as the guides I was working from were meant for the version just prior. I’m told it’s a bad idea to try to use PIDs and so on from other versions of betaflight as the algorithms change from time to time. So, I’ll tell you what I did with that warning in mind.
To flash the beecore v2 I did need to use a program to replace the USB driver for the beecore to a generic windows driver rather than the one that came with my computer.
Getting the E011 flying with the beecore v2 does require some fiddling. If you follow the setup guide from banggood for the beecore v2, you’ll be on the right path.
After that, you need to set your min_throttle and your max_angle settings and either set up an arming switch or learn the arming gesture.
I did get mine working with the stock PIDs and so on. However, I followed the “project mockingbird” document and was much happier with the results of that template for my quad.
Worth it?
The Beecore v2 gave me the ability to fly with a Devo 7E transmitter which I love for it’s flexibility and it’s relatively small size. I have always been resistant to having a “real” transmitter as I found the toy ones to be fine and perhaps importantly to me — small. However, the 7E is very nicely sized (small) and it makes a world of difference in controlling the quad. I got the DSM version, but in retrospect I should have gotten the Frsky version to get the RSSI feedback. RSSI is a transmitter strength indicator that you can see in your on-screen display so you know when you’re reaching the end of your transmitter’s control area and don’t end up having your quad fall out of the sky. It’s also helpful in diagnosis of any signal issues.
Having the Beecore v2 “woke up” the quad by allowing it to pitch and roll much further than the stock firm ware allows which results in a MASSIVE increase in speed. If you want to make your E011 faster — update the flight controller and (optionally) use a real transmitter. It’s truly an entirely different quad with these small modifications. Silverware will do much the same, and perhaps even be a better option if you’re a tinkerer. More on that in a moment.
The E011 goes from “meh” to fly, to a total blast when you can pitch the quad forward 80 degrees :).
OSD (on-screen display) is a nice to have. You can get battery voltage (sort of) and timers right in your goggles or your screen. The battery voltage is more of a guide. The voltage will always read substantially lower than it actually is when you are flying, especially at full throttle. I found it helpful as while the voltage number isn’t accurate (except when sitting still), it is somewhat predictable as long as you fly the same type of battery most of the time. I found my HV lipos also sag a lot less than the stock battery, which means without any other data that I can say pretty confidently that you’ll get more punch and throttle out of those at all points of the battery in addition to maximum raw power. The stock lipos eventually just found the recycling bin.
Betaflight has many useful features including the ability to test your motors and transmitter. You can test your motors one at a time in the motors tab to see if any of them are going bad (it’ll make a distinctive noise relative to all other good motors). You can also test your transmitter in the receiver tab to make sure that your transmitter is actually reaching 100% throttle, 100% pitch/roll/yaw/etc.
I found that for months I was flying with only about 80% of my available power because I hadn’t realized that my Devo 7E wasn’t’ setup properly for my beecore flight controller. Joshua Bardwell has a helpful little “eBook” on his site that pointed this out to me as well as how to fix it. In short, you’ll need to adjust the scale rates by clicking on the Elevator, Aileron, etc in your mixers.
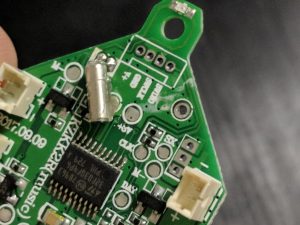
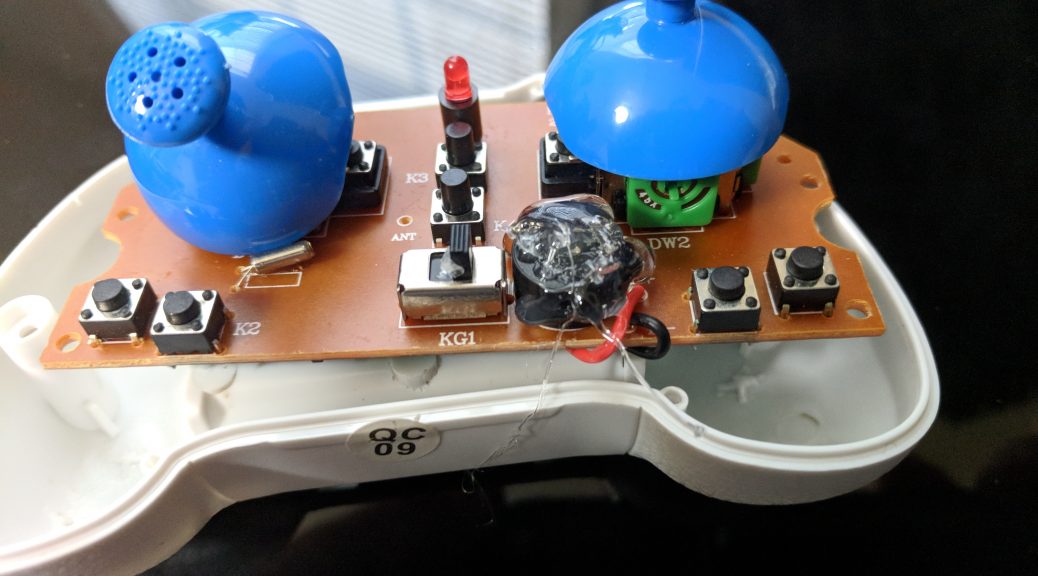
One final benefit of the beecore v2 is that you’re getting an integrated receiver which means less soldering AND because it’s not on the bayangtoys protocol, you won’t have a fragile crystal oscillator (that gray cylinder on the top of your e011 flight controller) to get damaged in a crash. This is a common challenge with the bayang based receivers, so, this is a nice side benefit!
I really like the beecore flight controller!
Silverware
Silverware has some unique advantages and disadvantages to betaflight and the beecore (and similar) flight controller. Silverware ins’t necessarily any more complicated than betaflight, but it doesn’t have a nice clean user interface either. Instead, you’ve got configuration files and a some software products that are aimed at software/electrical engineers to utilize.
If you’re reasonably comfortable with tech-y projects, then you won’t mind the process of flashing or of updating the configuration files for silverware. If it frightens you though, you may want to start with betaflight and come back to silverware if you are still interested to keep the hurdles to one at a time :).
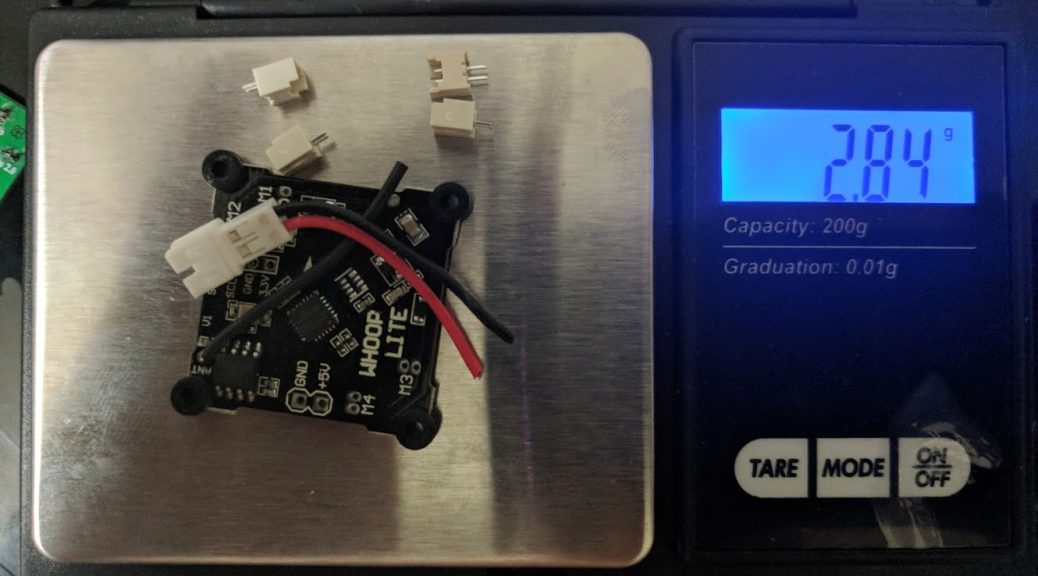
The UPSIDE of silverware is that you can use the stock flight controller. The stock flight controller is lighter than the beecore by about a gram (0.8 I believe from memory). That makes for a measurable difference in speed and flight time.
If you have a Devo 7E and have installed a module (I have the 3-in-1 in mine), then you also get additional range over the 7E’s stock DSM/Walkera module without having to do the “diode (really resistor) mod”.
You can ALSO use the Toy transmitter and get most of the benefits of betaflight, without the expense of a TX and the upgrade board. Even with the tiny controller, it’s still very controllable and fun to fly. Unfortunately, with silverware, once you pick the toy transmitter or an aftermarket TX, you’re stuck unless you reflash.
In addition to being lightweight, the stock flight controller is inexpensive. It’s “free” or a few dollars depending on your situation and build. One of the wonderful things abotu the E011 is that you get the whole quad, a TX, spare props, a frame, everything for $15ish. With silverware with a FPV camera attached — worse case, you lose about $30 if you lose your quad or if you crash it to death. If you have an aftermark FC, you’re talking about double that which is still cheap, but maybe less ideal.