Skip to content
Nathan W. Morris
Menu
Home
Category:
Uncategorized
Nathan W. Morris
>>
Uncategorized
Read More
August 1, 2017
August 1, 2017
Nathan W. Morris
Nathan W. Morris
Adding Dual Card to the Sony A7s II with Atomos Ninja Star
Regardless of what you shoot, it's likely that it would be expensive, impractical, or possibly…
0 Comments
Read More
February 17, 2017
February 17, 2017
Nathan W. Morris
Nathan W. Morris
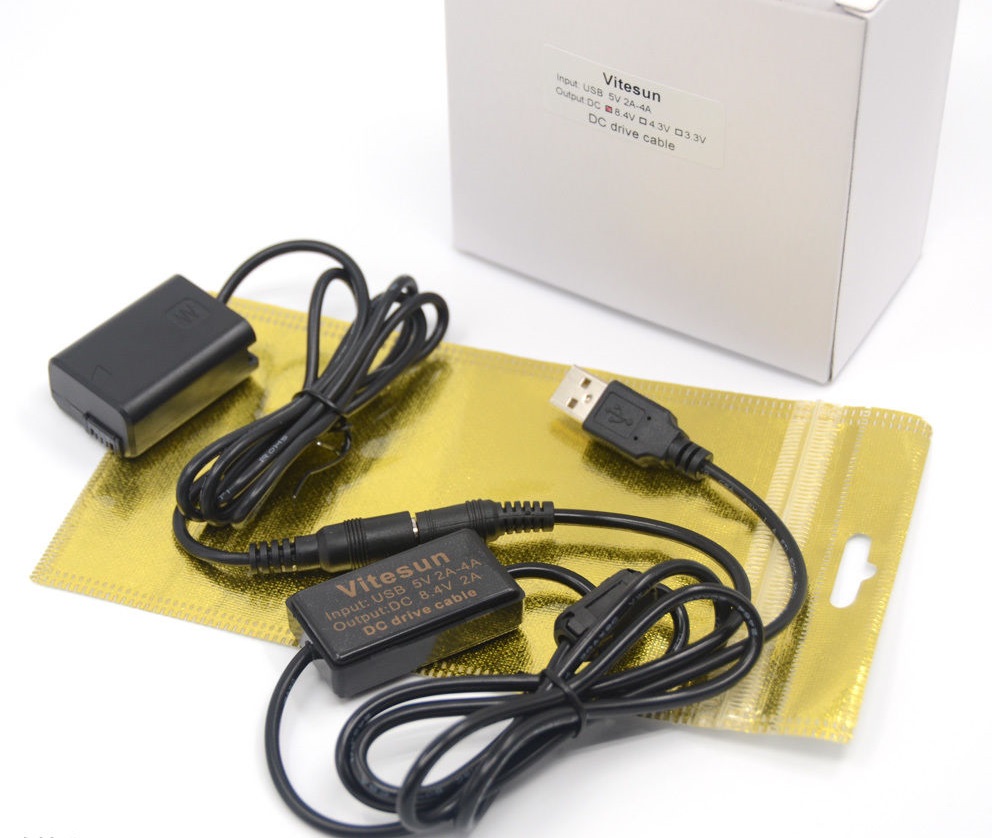
Powering Sony Cameras with USB (The “Right Way”)
This how-to covers any Sony camera with the NP-FW50 battery (Nex 5/5r/6/7/etc, Sony a6000, a6300,…
0 Comments
Read More
February 16, 2017
February 16, 2017
Nathan W. Morris
Nathan W. Morris
XLR Cable stuck in DR60D/DR70D permanent fix
Today I got a message from a fellow film maker who reminded me of a…
0 Comments
Read More
February 16, 2017
February 16, 2017
Nathan W. Morris
Nathan W. Morris
DIY: Shoe mount USB battery with cold shoe attachment
A number of Sony cameras (And cameras from other manufacturers) can now be both powered…
0 Comments
Recent Posts
Adding Dual Card to the Sony A7s II with Atomos Ninja Star
CAME-TV Boltzen LED review
Powering Sony Cameras with USB (The “Right Way”)
XLR Cable stuck in DR60D/DR70D permanent fix
DIY: Shoe mount USB battery with cold shoe attachment